DIY bullet pendant. Jewelry from old live ammunition - the work of Impact Accessories studio How to make a pendant from a cartridge case
Probably, this is the most creative disposal of war bullet casings that have served their time. Now they can be considered symbols of pacifists. I think “We are for peace and beauty” is a suitable slogan for Impact Accessories.


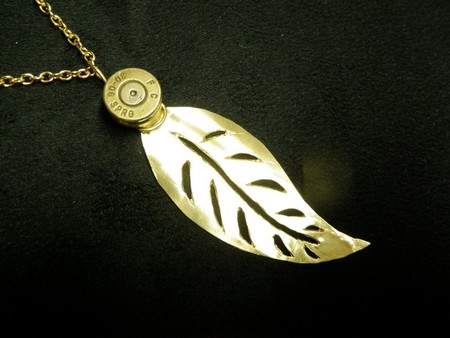

Craftsmen of a creative jewelry studio take used cartridges, bullets and casings for scrap, and make original jewelry (rings, pendants, pendants, earrings and crosses) from them, it is even possible to order them according to an individual design. Of course, everything is not so simple - the material of the bullets cannot be called malleable, it takes a lot of effort to straighten and align a small piece of metal. Surprisingly, the core of an empty cartridge case - the capsule becomes the center of the decoration, its main part, which is "played out" in different ways to transform into different peaceful things.


In addition to the fact that everything is polished and engraved, the craftsmen decorate "battle" decorations with pebbles. The main attraction of the studio's collection is the patron cross, which was made in Britain back in 1917. A real veteran who got a second life, beautiful and peaceful.


A few photos on "How it's done"


An original military-style medallion, inside which you can send a small photo or a miniature thing dear to your heart, can be easily made from old cartridges. Since you have to work with objects hazardous to life, make sure that they are completely safe and the possibility of an explosion is excluded.
Materials
To make a medallion from a cartridge with your own hands, prepare:
- two cartridges;
- a piece of copper wire;
- nippers;
- soldering iron;
- solder;
- Dremel with metal cutting and grinding attachments;
- nail;
- a hammer;
- vice.
Step 1... Take the first chuck and clamp its plastic part in a vise.

Step 2... Heat the sleeve with a blowtorch. Don't overdo it, 5-10 seconds will be enough. Carefully remove the sleeve from the plastic sheath.


Step 3... Using a hammer and nail, remove the primer from the sleeve. Try not to damage it. It will be needed for further work.

Step 4... Repeat steps one through three, inclusive, for the second cartridge. Please note that their caliber should be the same, but the brands should be different. As practice has shown, the sleeves of the same brand for some reason do not fit well into each other, but for this work, this is the key point.

Step 5... Fix the second sleeve in a vice or in another convenient way, and cut off part of the side walls.


Step 6... Take a small sanding block or a Dremel machine with a sanding attachment and thoroughly sand the inside of the two shells. You need to remove the remaining plastic from the walls, and also strip the hole for the capsule from the sharp metal edges.


Step 7... The side walls of the capsules must also be cut off, and then the edges of the slices must be carefully sanded.

Step 8... Insert the primers back into the holes on the sleeves and secure them with epoxy glue.

Step 9... Fit the sleeve, the height of the walls of which has remained unchanged, onto a metal part of a suitable diameter. Expand the diameter of the workpiece carefully. Check that the second workpiece from the sleeve fits into the first and at the same time sits tightly.
Someone will say that this is a pendant, someone will call it a pendant - the essence is not so important. In any case, we will consider how to make this product with our own hands from a 7.62 caliber bullet. Such an adornment will be a good souvenir or gift for a man, a connoisseur of military affairs.
Safety first. We are not responsible if your work (God forbid, of course) ends in failure for you. We chose the 7.62 sniper cartridge, the drilling of which does not bode well. If you have a sighting-incendiary, tracer or armor-piercing-tracer cartridge, then it is better to throw this venture out of your head - it is dangerous to handle such bullets at home with your own hands.
Why pendant and why 7.62
For making a pendant with our own hands, we chose a 7.62 caliber bullet and there is an explanation for that. Firstly, the bullet size is 32 mm high and this is much more noticeable than, for example, the 5.45 bullet. Secondly, the weight of the 7.62 bullet is almost 10 grams and it is weighty, perceptible and somehow masculine, if you like. For example, a 5.45 bullet weighs only 3.4 grams, which seemed too small to us. And drilling such a small bullet will be somewhat inconvenient.
However, these are just our comments and they do not mean at all that a cartridge with a 5.45 bullet is not suitable for making a pendant with your own hands. Perhaps you just want to make a small and light pendant, or maybe you have a bullet of this caliber lying around. If so, then the algorithm of actions is not much different from ours.
Bullet pendant: step by step description and photo
Here is a cartridge from which we have to remove a bullet and make a pendant out of it with our own hands. This PS is a sniper cartridge for the Dragunov rifle, which was made in 1977 and has been perfectly preserved to this day. The caliber, as already mentioned, for a bullet is 7.62 and this is quite enough for us to make a not large, but not a small pendant (suspension).
First you need to remove the bullet. There are several ways and they are all good in their own way: you can clamp the bullet with pliers and gently loosen it, you can use the force of your fingers, or you can drill a hole in a wooden block with a diameter of 8 mm, insert the bullet into the hole and loosen it thus, holding the cartridge case with your hand. A small vice can also help you out. We abandoned pliers and vices for one reason: I don't want to accidentally scratch the bullet. Drilling a hole in a block or board is an option, because soft wood will not leave marks on the bullet. But we refused from this, because we know that with your fingers you can pull out a bullet easily and easily.  The photo shows that after the first press, the bullet gave in and slightly bent the sleeve. Believe me, it's very simple and easy - the efforts of an adult man will probably be enough. Next, carefully loosen the bullet and pull it out at the same time.
Here is a photo after disassembling the cartridge: the case, gunpowder and the bullet itself.  We will leave the cartridge case just in case (we'll figure out what to make of it), we will also collect the gunpowder - we will make a small rocket for demonstration to the guys in the yard, as well as for instilling curiosity and homemade products. But this is all later, but for now, a do-it-yourself pendant-pendant is on the agenda.
Actually, everything is simple - you just need to drill a hole where the cord, chain or ring will be threaded. Only not everyone manages to do this and at the same time not scratch the bullet. We solved this problem simply: we needed a piece of plastic windowsill lying around, a vice and a sharp nail (a pencil, pen, marker or core will do - if only we could put a mark on the plastic).
The photo shows how we continued the work: the plastic window sill was tightened in a vice, and by the bullet placed next to it, you can mark the place for the hole.  In our case, an 8 mm hole will be made in the pendant from the edge of the bullet, since the suspension will be attached to a simple nylon cord. If you want to insert the metal ring first, then you should choose the exact drilling location so that the ring is accurately seated. Inside the plastic product there are random honeycombs and there were several of them where the bullet was very tight. So tight that fears of bullet rotation or deflection while drilling were instantly eliminated.
If you have not yet understood what such wisdom is for, then we will explain. Many don't know how to drill through a bullet and keep it smooth. appearance... You can clamp it in a vice through a piece of rubber or wrap it with electrical tape so that the drill does not slip. But we had previously tried both options and they did not fit: even if you screwed on the bullet, the drill immediately slipped when it touched and left a mark on the surface of the future pendant. In our case, the bullet is securely clamped, and the 1.5 mm plastic wall served as a kind of guide for the drill.
But in the photo the drilling process itself.  Nothing complicated when there is a screwdriver or drill with the ability to adjust the speed. As you can imagine, big turns are not needed here. It is important that the drill is directed strictly horizontally and then the hole will not be beveled to one side. It is also advisable to outline the direction of the drill so that it passes through the center of the bullet, although even a slight deviation will not significantly affect - the pendant will look beautiful. We drilled with a 1.5 mm drill. We believe that the large diameter of the hole is inappropriate for reasons of aesthetics.
The hole is now complete and we recommend using a slightly larger drill bit to bore the edges of both holes.  Firstly, it will remove the burrs, and secondly, the cord will not rub against sharp edges. We used a 3.5 mm drill bit, which we got from the CISS kit for the printer. Just forget about the help of a drill or a screwdriver - there is a risk that the drill will quickly enter the bullet at speed and then you will ruin the workpiece. Better by hand, just a couple of turns.
That's all, you made the pendant with your own hands, you just have to stretch the cord. We purchased a dark-colored lace from a church shop, but you can even use a chain if you wish. 
Instead of a conclusion
It is not difficult to make a pendant from a bullet with your own hands, as you have already seen. Of the most important rules, always remember the following: not every bullet can be drilled and any scratch will be too noticeable on the surface. Regarding the first Internet to help you - there are many sites where the marking of cartridges is indicated. The second rule, or rather, its consequences depend on you. Accuracy and accuracy again - it will take very little time to make the pendant, so there is no need to rush.